
Substack* is booming.
This rather simplistic newsletter and blogging platform that remains totally free to use is a hit with budding newsletter creators, bloggers, and content creators as well as established journalists and writers.
Substack is growing day by day.
But the platform does come with considerable downsides. It’s a writer-centric platform and that, it does perfectly well.
But for email marketing purposes, Substack is lacking a number of important features. It’s not its strong suit, nor is it supposed to be that.
One thing I do wish Substack would optimize is their embed form.
What is an embed form
If you don’t know what that is, here’s the gist:
A website embed form is a snippet of code that allows you to integrate an external subscribe form (or other forms) directly into your website.
It enables visitors to interact with and subscribe to the embedded service without leaving your site.
This seamless integration enhances user experience, promotes engagement, and facilitates actions like newsletter sign-ups or content subscriptions directly from your website.
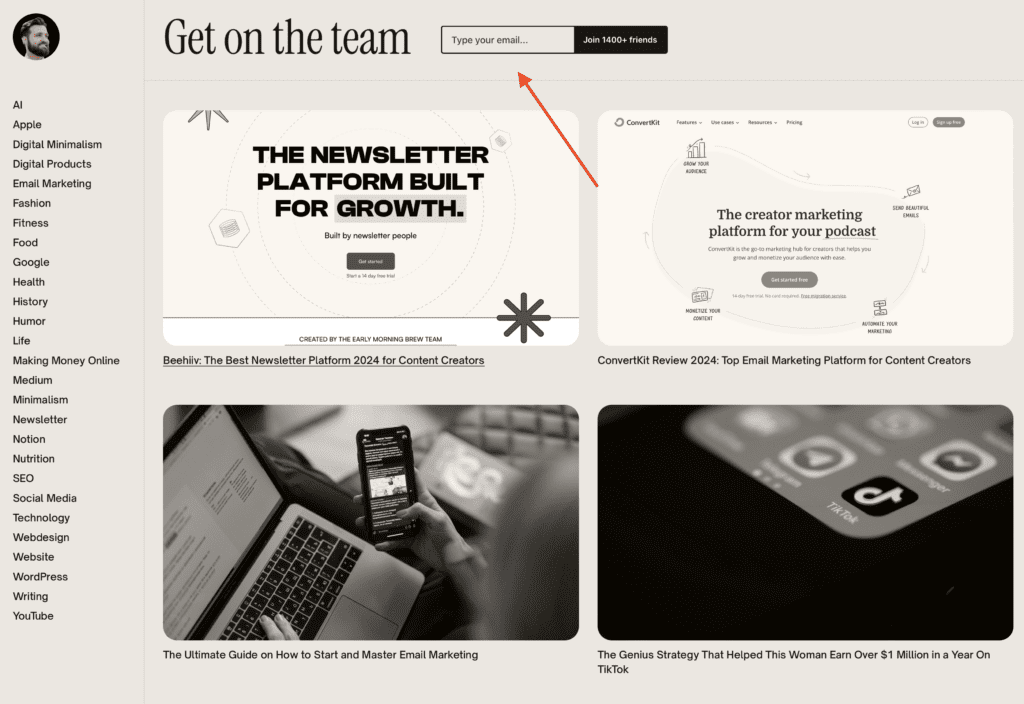
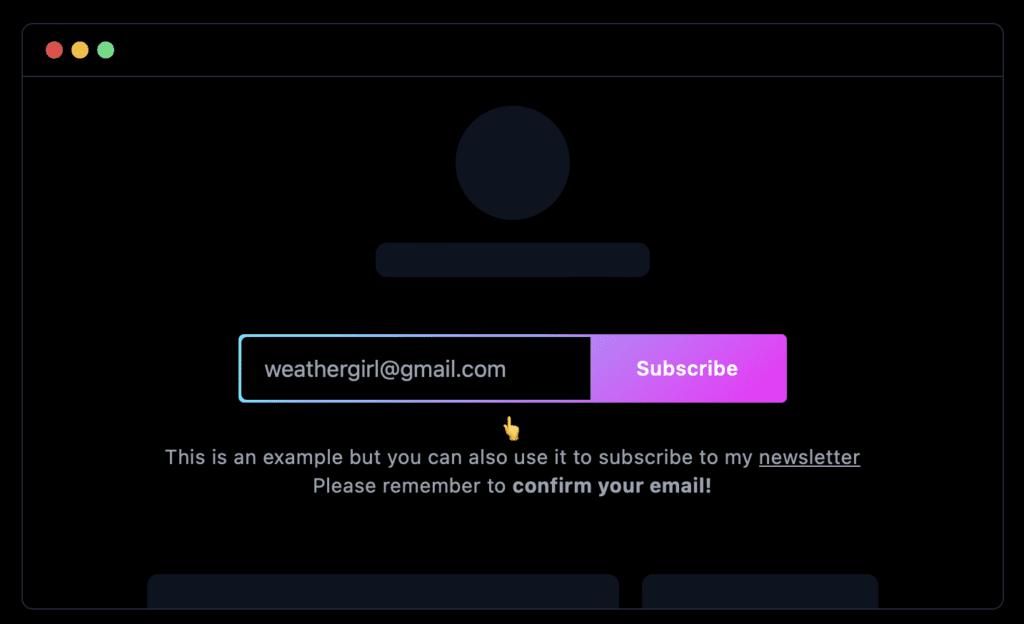
Here’s an example embed form from my website:
Most newsletter platforms offer this out of the box. So does Substack. But their option is rather limited.
I’ll show you how to embed a Substack form into your website the default way, and a better option to integrate a more customized form.
Let’s go!
Why you should embed a Substack form on your site
Before delving into the integration process, let’s explore the compelling reasons to embed a Substack form on your website.
Convenience and brand identity
Embedding a Substack form on your website offers convenience for visitors.
They can seamlessly subscribe to your newsletter without leaving your site, fostering a smoother user experience.
Additionally, this integration ensures brand cohesion by keeping users focused on your brand identity; your colors, logos, styles, and style.
Email list growth and monetization
One of the primary benefits is the significant boost in email list growth.
By eliminating the need for users to navigate away from your site, you can increase opt-ins and conversions, ultimately building a more extensive and engaged audience.
This is crucial.
Moreover, the integration can facilitate direct traffic flow into paid upgrades, unlocking the potential for monetization.
Owned platform and control
When you embed a Substack form on your website, you retain control via your website and email lists.
It’s your site, after all.
This ownership ensures that you have control over your content and audience, design and feel.
Crucial aspects of building a sustainable and memorable online presence.
Choose the right Substack integration method
When it comes to integrating Substack with your website, you have two main options to consider, each with its unique advantages.
Although the first option doesn’t really offer much upside, to be honest.
1. Substack’s default iFrame embed
Substack provides a default embed code that is easy to use but lacks customization capabilities.
The form may appear unprofessional on mobile devices, making it a less favorable option.
How to use Substack’s default iFrame embed:
- Go to your Substack publication’s Settings page
- Look for the setting Import
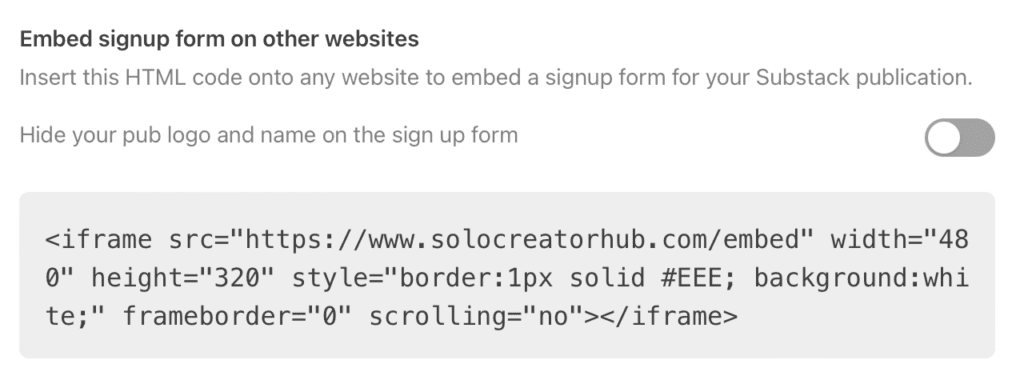
- Find the section Embed signup form on other websites
- Copy the default embed code from there
- Optional: You can also hide your publication’s name/logo via the toggle above
Pros:
- Simplicity and ease of use
- Quick integration for non-technical users
- official solution from Substack
Cons:
- Limited customization options
- Less mobile-friendly appearance
- issues with width on small devices
2. Custom Substack embed
For greater customization options and improved mobile responsiveness, a custom Substack embed form is recommended.
It provides styling flexibility and optimized embed codes for all devices, enhancing the overall appearance of the form.
The best one for this job is substackapi.com.
And I use that one on my website in the screenshot you have already seen:

substackapi.com is completely free to use and fairly simple to set up!
Here’s how to set up a custom Substack embed form via substackapi.com:
- Generate embed code at substackapi.com
- Copy and paste the customized code into your website
- DONE
Pros:
- Enhanced customization options like colors, placeholders, button text, etc.
- Improved mobile responsiveness
- Styling flexibility
Cons:
- Requires a tiny bit of technical knowledge
- it’s no official Substack solution
Steps to properly embed the Substack signup form
Follow these detailed steps to seamlessly integrate a Substack email signup form on your website:
1. Get the necessary embed code
- Go to your Substack publication’s Settings page as mentioned before
- For the default form, copy the provided code. For a custom form, generate the code at substackapi.com.
- (make the desired styling changes)
2. Add the code to your website correctly
- Paste the embed code into your page’s HTML, typically in the footer if you run a simple HTML/CSS website that you code or change yourself.
- Use a suitable code block or integration method based on your blogging platform, on WordPress, for example, choose the Custom HTML block. Most platforms offer a similar way to add HTML code snippets to your website
- (Customize the form’s width parameter for responsive mobile optimization if needed. Probably not needed though!)
3. Test, optimize, and spread the word
- Test the form by subscribing yourself (with an email address other than your Substack account address).
- Make any necessary tweaks to the form’s styling or behavior.
- Promote your content to drive website traffic and grow your subscriber list.
- DONE
By embedding your Substack newsletter form on your website, you not only enhance user experience, but also retain control, driving conversions seamlessly.
Advanced tips for customizing your embedded Substack form
Once you’ve mastered the basics, consider these advanced tricks to optimize and enhance your Substack form:
1. Adjust form parameters
On substackapi.com, you can adjust some things in the code snippet, like the email placeholder (which is the email address or text that is displayed before you type anything), or the subscribe button text.
Right within the HTML code snippet, simply change the bits you want to customize.
Here’s an example (The changed bits are in UPPERCASE):
<div id="custom-substack-embed"></div>

<script>
  window.CustomSubstackWidget = {
    substackUrl: "burk.substack.com",
    placeholder: "GIVE ME YOUR EMAIL",
    buttonText: "HIT ME",
    theme: "green",
    // Go to substackapi.com to unlock custom redirect

  };
</script>
<script src="https://substackapi.com/widget.js" async></script>
Also, don’t forget to include the correct Substack URL, this part of the code substackUrl: “burk.substack.com”.
2. Add custom colors
substackapi.com gives you the option to quickly select a pre-defined color option, but you can also use a custom one.
For your own site and branding, a custom color is better.
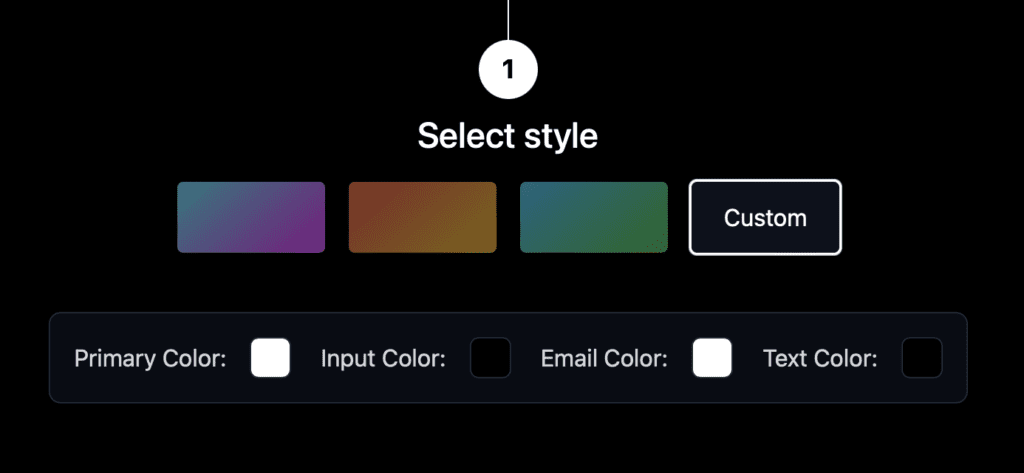
Simply click on the custom button. You will see a new block below with some coloring options. They are:
- The primary color which is the outline or border of the form and the background of the button
- The input color which is the background color of text in the email field
- The email color which is the text color of the email
- The text color which is the color of the subscribe button text
A little confusing, I know.
You may also notice that with this custom option, the code that you need to copy changes. It adds all these options as lines to the code.
It will look something like this afterward:
<div id="custom-substack-embed"></div>

<script>
  window.CustomSubstackWidget = {
    substackUrl: "prostack.substack.com",
    placeholder: "example@gmail.com",
    buttonText: "Subscribe",
    theme: "custom",
    colors: {
      primary: "#FFFFFF",
      input: "#E52424",
      email: "#090A0B",
      text: "#A83B3B",
    },
    // Go to substackapi.com to unlock custom redirect

  };
</script>
<script src="https://substackapi.com/widget.js" async></script>
This is what we want. You can now copy this code to your website.
3. Display the forms above-the-fold
If the newsletter signup is crucial for you on your website, place it right at the top or near the top, also called “above the fold”, meaning in the visible part of the website on each load.
For websites, this could be the header, or right below that, or even a popup solution, although I generally prefer the former.
4. Incentivize signups with unique value propositions
Reiterate the unique value proposition of your newsletter to incentivize signups.
Offer lead magnets like discounts or freebies for more conversions. This is an age-old trick. The key is providing value, not just a gimmick to get email addresses.
The bottom line
Embedding a Substack form on your website opens up a world of possibilities for audience growth and engagement.
Whether you choose WordPress, Squarespace, create your own HTML site, or use another platform from the gazillions online, this Substack embed helps you integrate a simple, sleek signup form for your Substack publication into your website.
It’s not too complicated, but it makes a huge difference.
You can see my Substack embed form in action right here ↓ (and sign up if you fancy 😉):